The PowerFlex 753 is a cost-effective‚ user-friendly AC drive designed for general-purpose applications‚ offering built-in safety features and seamless integration with Allen-Bradley controllers.
1.1 Overview of PowerFlex 753 Drive
The PowerFlex 753 drive is a high-performance AC drive designed for industrial motor control applications. It offers advanced vector control technology‚ enabling precise speed and torque regulation. The drive is built to handle demanding environments‚ with robust construction and reliable operation. It supports multiple control modes‚ including V/Hz‚ sensorless vector‚ and flux vector control‚ making it versatile for various industrial needs. The PowerFlex 753 also incorporates built-in safety features‚ such as Safe-Off and Safe-Stop functions‚ ensuring operational safety. Its compact design and modular architecture simplify installation and integration into existing systems. With energy-efficient operation and customizable parameters‚ the PowerFlex 753 is an ideal solution for applications requiring high accuracy and reliability.
1.2 Key Features and Benefits
The PowerFlex 753 drive offers a range of advanced features designed to enhance industrial automation. It provides high-performance motor control with adaptive algorithms‚ ensuring optimal performance across varying load conditions. The drive supports multiple control modes‚ including V/Hz‚ sensorless vector‚ and flux vector control‚ allowing flexibility for diverse applications. With built-in high-speed communication options like EtherNet/IP and Modbus TCP/IP‚ it seamlessly integrates with modern industrial networks. Energy efficiency is maximized through advanced motor control techniques‚ reducing operational costs. The drive also includes robust safety features‚ such as Safe-Off and Safe-Stop‚ to protect personnel and equipment. Its compact‚ modular design simplifies installation and reduces panel space requirements‚ making it a cost-effective and reliable solution for industrial automation systems.
1.3 Applications of PowerFlex 753
The PowerFlex 753 drive is versatile and suitable for a wide range of industrial applications. It is commonly used in material handling systems‚ such as conveyors and cranes‚ where precise motor control is essential. Additionally‚ it is ideal for pumping systems‚ fans‚ and compressors‚ where energy efficiency and variable speed control are critical. The drive is also widely applied in HVAC systems‚ industrial machinery‚ and automated production lines. Its flexibility makes it a preferred choice for applications requiring high-performance motor control‚ seamless communication‚ and integration with advanced automation systems. Whether for small-scale operations or large industrial plants‚ the PowerFlex 753 supports efficient and reliable operation across diverse industries.

System Requirements and Compatibility
The PowerFlex 753 requires specific hardware‚ compatible software‚ and supported communication protocols to ensure optimal performance‚ efficiency‚ and seamless integration within industrial automation systems and infrastructure.
2.1 Hardware Requirements for Installation
The PowerFlex 753 drive requires a compatible control system‚ a suitable power supply‚ and a motor designed for variable speed operation. Ensure the drive is installed on a sturdy‚ vibration-free mounting surface using the provided hardware. Additional components like control devices‚ sensors‚ and communication modules may be needed based on the application. The drive supports standard induction and synchronous motors with power ratings up to 150 HP. Proper wiring and connectors are essential for safe and reliable operation. Verify that the installation environment meets the specified temperature‚ humidity‚ and enclosure rating requirements. Refer to the official manual for detailed hardware specifications and compatibility charts.
2.2 Software Compatibility and Recommendations
The PowerFlex 753 drive is compatible with Rockwell Automation’s Studio 5000 software for programming and configuration. Ensure the latest version of Studio 5000 is installed for optimal performance. Additionally‚ the drive supports integration with Rockwell’s FactoryTalk View ME and SE for HMI applications. Always use the recommended firmware version for the PowerFlex 753‚ available on the official Rockwell Automation website. For initial setup‚ the DriveTools SP software is required for parameter configuration and troubleshooting. A compatible programming terminal or PC with appropriate specifications is also necessary. Ensure the operating system is Windows 10‚ Windows Server 2016‚ or higher‚ as these are supported platforms. Adhere to Rockwell’s software recommendations to avoid compatibility issues.
2.3 Supported Communication Protocols
The PowerFlex 753 drive supports multiple communication protocols to ensure seamless integration with various control systems. EtherNet/IP‚ Modbus TCP/IP‚ and DeviceNet are among the most commonly used protocols. These protocols enable communication with programmable logic controllers (PLCs)‚ human-machine interfaces (HMIs)‚ and other industrial devices. The drive also supports USB connectivity for direct programming and configuration using compatible software tools. Ensure the selected protocol matches the system architecture to maintain optimal performance. Proper configuration of these protocols is essential for reliable operation and data exchange. Always refer to the official Rockwell Automation documentation for detailed protocol specifications and setup guidelines.

Pre-Installation Planning
Assess site conditions‚ ensure safety measures‚ and gather necessary tools and materials. Review installation manuals and understand environmental requirements for optimal setup and operation.
3.1 Site Preparation and Safety Considerations
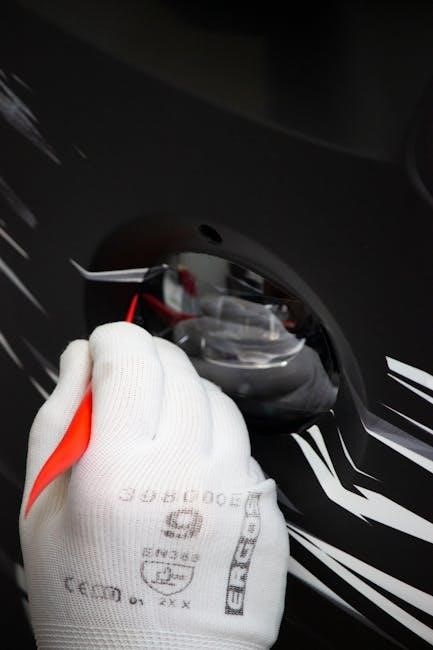
Before installing the PowerFlex 753 drive‚ ensure the site is prepared to meet safety and operational requirements. Clear the installation area of obstructions and ensure proper lighting. Verify that the floor is level and can support the weight of the equipment. Wear appropriate personal protective equipment (PPE)‚ such as safety glasses and gloves‚ to prevent injury. Ensure all power sources are disconnected before handling the drive. Ground the equipment properly to prevent electrical hazards. Maintain good ventilation to avoid overheating. Familiarize yourself with emergency procedures and ensure access to fire extinguishers. Conduct a risk assessment to identify potential hazards and implement mitigation strategies. Adhere to local safety regulations and standards during the process.
3.2 Tools and Materials Needed
To ensure a smooth installation of the PowerFlex 753 drive‚ gather the necessary tools and materials beforehand. Essential tools include a flathead and Phillips screwdriver‚ adjustable wrench‚ pliers‚ wire cutters‚ and a multimeter for voltage checks. A torque wrench is required for securing bolts to the recommended specifications. For connectivity‚ have Ethernet cables‚ USB cables‚ and communication modules ready. Additional materials include thermal paste for heat sink installation‚ mounting brackets‚ and fasteners suitable for the drive’s weight. A laptop or programming device with Rockwell Automation software is needed for configuration. Ensure a stable power supply and backup‚ such as a UPS‚ for testing. Safety gear like gloves‚ goggles‚ and an anti-static wrist strap are crucial for protection. Organize all components neatly to avoid delays during installation.
3.3 Understanding the Installation Environment
Understanding the installation environment is critical for optimal performance of the PowerFlex 753 drive. Ensure the drive is installed in a clean‚ dry‚ and well-ventilated area to prevent dust and moisture accumulation. The operating temperature range is typically between 0°C and 40°C‚ with relative humidity below 95% non-condensing. Proper airflow is essential to maintain thermal stability and prevent overheating. The drive should be mounted in a stable‚ vibration-free environment to avoid mechanical stress. Ensure the power supply is stable and meets the drive’s voltage and frequency requirements. Grounding should be done correctly to avoid electrical noise. Familiarize yourself with the site’s electrical and mechanical specifications to ensure compliance with the drive’s ratings and operational limits. A suitable enclosure or mounting surface should be used to protect the drive from environmental hazards. This ensures reliable operation and longevity of the PowerFlex 753 drive in industrial applications.
Installation Process
The PowerFlex 753 installation process involves unpacking‚ inventorying‚ and mounting the drive‚ followed by power and motor connections‚ and configuring I/O and communication settings.
4.1 Unpacking and Inventory of Components
Begin by carefully unpacking the PowerFlex 753 drive and all accessories from the shipping container. Inspect for any visible damage during transit. Verify the contents against the packing list to ensure all components‚ such as the drive unit‚ mounting hardware‚ and documentation‚ are included. Handle the drive with care to avoid static discharge‚ which can damage sensitive electronics. Use an anti-static wrist strap or mat if available. Organize the components in a clean‚ dry workspace to prevent misplacement. Refer to the installation manual for specific instructions on identifying and preparing each part for installation. This step ensures a smooth and efficient setup process.
4.2 Mounting the PowerFlex 753 Drive
Mount the PowerFlex 753 drive on a flat‚ stable surface using the provided mounting hardware. Ensure the surface is clean and free from debris to prevent damage. The drive should be installed in a vertical position to maintain proper cooling and functionality. Use the specified bolts and washers to secure the unit firmly. Ground the drive according to the manual to ensure safe operation and prevent electrical interference. Tighten all connections to the recommended torque specifications. Double-check the alignment and ensure all screws are securely fastened. Proper mounting is critical for reliable performance and to prevent vibration or mechanical stress on the drive. Refer to the installation manual for detailed torque values and mounting guidelines to ensure compliance with safety standards.
4.3 Connecting Power Supply and Motor
Start by ensuring the power supply matches the drive’s voltage and current ratings to prevent damage. Use the appropriate wire gauges and secure all connections tightly to avoid arcing or overheating. Connect the motor wires to the drive’s terminals‚ ensuring they are properly matched according to the motor’s nameplate data. Use shielded cables for motor connections to minimize electromagnetic interference. Always turn off the power supply before making any connections. Double-check the polarity of the power supply and motor connections to ensure correct operation. Verify all connections are secure and meet the drive’s torque specifications. Follow the manufacturer’s guidelines for proper wiring practices to ensure safe and reliable operation. Proper connections are critical for optimal performance and to prevent potential damage to the drive or motor.
4.4 Configuring I/O and Communication Ports
Begin by powering up the drive and accessing the control interface via the Human Interface Module (HIM) or a connected PC. Assign the digital and analog I/O ports according to the system requirements‚ ensuring correct functionality for inputs like start/stop commands and outputs for status indicators. Configure the communication ports by selecting the desired protocol‚ such as Ethernet/IP‚ Modbus TCP/IP‚ or DeviceNet‚ from the drive’s software. Set the baud rate‚ IP address‚ and other protocol-specific parameters to match the control system. Test the communication setup to ensure proper data exchange between the drive and the controller. Refer to the reference manual for detailed protocol settings and troubleshooting tips to ensure seamless integration with your automation system.

Configuration and Setup
The configuration and setup process involves defining drive parameters‚ programming motor control logic‚ and establishing communication with external controllers. Use the provided software tools to customize settings‚ ensuring optimal performance and integration with your automation system. Refer to the manual for detailed instructions and troubleshooting guidance.
5.1 Initial Parameter Settings
Initial parameter settings are crucial for ensuring the PowerFlex 753 drive operates correctly with your motor and system. Begin by entering basic motor information‚ such as nameplate ratings‚ into the drive parameters. Set the motor control mode (e.g.‚ V/Hz or vector) based on your application needs. Configure acceleration and deceleration rates to match the requirements of your machinery. Enable safety features like motor and drive protection to prevent damage. Use Rockwell Automation’s software tools to upload and verify these settings. Always test the drive in a safe‚ low-power environment before full operation. Properly documenting these settings ensures consistency and simplifies future maintenance or troubleshooting efforts.
5.2 Programming the Drive for Motor Control
Programming the PowerFlex 753 drive involves setting up motor control parameters to achieve precise operation. Use Rockwell Automation’s software tools to define motor control strategies‚ such as speed‚ torque‚ and position control. Set up closed-loop or open-loop control modes based on application requirements. Configure acceleration and deceleration rates to ensure smooth motor operation. Define the motor’s rated speed‚ torque‚ and other characteristics to optimize performance. Enable advanced features like slip compensation or adaptive tuning if required. Verify the motor and drive interaction by running test cycles. Ensure all safety and monitoring functions are integrated into the program. Proper programming ensures reliable motor control‚ reduces wear on equipment‚ and enhances overall system efficiency. Always refer to the drive’s reference manual for detailed instructions.
5.3 Setting Up Communication with Controllers
Setting up communication with controllers ensures seamless integration of the PowerFlex 753 drive within an automation system. Choose the appropriate communication protocol‚ such as EtherNet/IP‚ DeviceNet‚ or ControlNet‚ based on the controller’s compatibility. Configure the drive’s communication parameters‚ including baud rate‚ node address‚ and protocol-specific settings. Use Rockwell Automation’s software to define the connection and map I/O data. Test the communication link to verify data exchange between the drive and controller. Ensure proper grounding and termination of communication cables to prevent noise interference. Document the configuration for future reference and troubleshooting. Proper communication setup ensures reliable data transfer‚ enabling precise control and monitoring of the motor system. Always follow the drive’s reference manual for protocol-specific instructions.
5.4 Testing and Validation of Configuration
After configuring the PowerFlex 753 drive‚ perform thorough testing to validate the setup. Run the drive in test mode to ensure proper motor operation and verify that all programmed parameters function as intended. Check communication with controllers by monitoring data exchange and ensuring commands are executed correctly. Test safety features‚ such as safe torque-off‚ to confirm compliance with safety standards. Use diagnostic tools to identify and resolve any configuration errors. Validate I/O and communication port settings to ensure accurate data transmission. Document test results for future reference and system optimization. Proper testing ensures the drive operates reliably and integrates seamlessly with the automation system. Always refer to the drive’s reference manual for specific test procedures and validation guidelines.

Safety Features and Compliance
The PowerFlex 753 drive incorporates advanced safety features‚ ensuring operational safety and compliance with global standards‚ while its design supports reliable performance across various industrial applications.
6.1 Built-in Safety Functions
The PowerFlex 753 drive is equipped with advanced built-in safety functions to ensure safe operation and protect personnel. These include Safe-Off‚ Safe Stop‚ and Safe Torque Off‚ which allow controlled shutdowns and prevent unexpected motor startups. The drive also features redundant safety paths and fault detection mechanisms to handle potential hazards proactively. Its design incorporates protective measures against short circuits‚ overloads‚ and voltage fluctuations‚ ensuring reliable performance in demanding environments. These safety features are integral to the drive’s architecture‚ providing an additional layer of security for industrial applications while meeting stringent safety standards.
6.2 Compliance with International Standards

The PowerFlex 753 drive adheres to multiple international safety and performance standards‚ ensuring compliance across global markets. It meets IEC (International Electrotechnical Commission) standards for electrical safety and efficiency‚ as well as UL (Underwriters Laboratories) certifications for North America. Additionally‚ the drive complies with CE marking requirements for Europe and ISO standards for quality and environmental management. These certifications ensure the drive operates safely and efficiently in diverse industrial environments. Compliance with these standards is verified through rigorous testing and inspection‚ guaranteeing reliability and adherence to global regulations. This broad compliance ensures the PowerFlex 753 can be deployed in various regions with confidence in its performance and safety.
6.3 Best Practices for Safe Operation
Ensure safe operation of the PowerFlex 753 by following established best practices. Always refer to the official installation manual and safety guidelines provided by Rockwell Automation. Properly ground the drive to prevent electrical hazards‚ and ensure all personnel involved in installation or maintenance are trained and authorized. Use appropriate personal protective equipment (PPE) when working with electrical systems. Regularly inspect the drive and motor for wear or damage‚ and replace components as needed. Avoid overriding safety features or bypassing protective functions. Implement lockout/tagout procedures during maintenance to prevent accidental start-up. Keep the drive and surrounding area clean and free from debris to maintain optimal performance and safety. Adhere to all local and international safety regulations to ensure a secure operating environment.

Maintenance and Troubleshooting
Regularly inspect and maintain the PowerFlex 753 to ensure optimal performance. Monitor drive status‚ clean components‚ and update firmware as needed. Use diagnostic tools to identify and resolve issues promptly‚ ensuring minimal downtime and reliable operation.
7.1 Routine Maintenance Schedule
Implement a regular maintenance schedule to ensure the PowerFlex 753 operates efficiently. Clean dust from heat sinks and fans monthly to prevent overheating. Inspect power and motor connections quarterly for tightness and wear. Replace air filters every 6 months or as needed. Check capacitor condition annually and replace if degraded. Monitor drive temperature and ensure proper ventilation. Update firmware periodically to maintain performance and security. Keep records of maintenance activities for tracking and future reference. Address any unusual noises or vibrations promptly to prevent potential failures. Always refer to the official manual for detailed maintenance procedures and guidelines.
7.2 Common Faults and Error Codes
The PowerFlex 753 may encounter specific faults during operation‚ often indicated by error codes. Common issues include overvoltage‚ undervoltage‚ and motor overload‚ typically caused by improper power supply or motor connections. Communication errors may occur due to incorrect settings or wiring issues. Overheating can trigger faults if cooling systems are inadequate or blocked. Users should refer to the error code list in the manual for precise troubleshooting. For example‚ codes like “OF00” or “F000” indicate specific problems requiring immediate attention; Always address faults promptly to prevent damage. Use diagnostic tools to identify root causes and consult the manual for corrective actions. Regular maintenance can help minimize these issues.
7.3 Diagnostic Tools and Techniques
The PowerFlex 753 offers advanced diagnostic tools and techniques to identify and resolve issues efficiently. The drive’s built-in LCD display provides real-time status updates and error codes‚ aiding quick troubleshooting. Software tools like RSLogix and Connected Components Workbench allow users to monitor drive performance‚ log data‚ and analyze trends. Additionally‚ Ethernet communication enables remote monitoring and diagnostics‚ reducing downtime. Users can also utilize oscilloscope measurements for motor and power analysis. Regularly reviewing error logs and event histories helps identify recurring issues. By leveraging these tools and techniques‚ technicians can pinpoint faults‚ perform repairs‚ and optimize system performance effectively. Proper training and reference to the manual ensure accurate diagnostics and maintenance.

Advanced Features and Customization
The PowerFlex 753 offers programmable parameters‚ customizable settings‚ and advanced integration capabilities‚ allowing tailored solutions for specific applications. Users can leverage software tools for enhanced configuration.
8.1 Customizing Drive Parameters
Customizing drive parameters on the PowerFlex 753 allows for precise control and optimization of motor performance. Users can adjust parameters such as motor speed‚ torque‚ and acceleration rates to meet specific application requirements. The drive also supports customizable input/output configurations‚ enabling tailored integration with external devices. Advanced parameters like flux control and slip compensation can be fine-tuned for improved motor efficiency and stability. Utilizing Rockwell Automation’s software tools‚ users can easily modify these settings and store them for future use. This flexibility ensures the drive operates seamlessly within diverse industrial environments‚ delivering enhanced productivity and reliability. Regular parameter updates can also adapt the drive to evolving system demands.
8.2 Integrating with Other Automation Systems
The PowerFlex 753 drive seamlessly integrates with various automation systems‚ enhancing industrial control and efficiency. It supports multiple communication protocols like Ethernet/IP‚ Modbus TCP/IP‚ and DeviceNet‚ ensuring compatibility with diverse industrial networks. This capability allows the drive to interact with programmable logic controllers (PLCs)‚ human-machine interfaces (HMIs)‚ and other automation devices. Integration with Rockwell Automation’s ControlLogix and CompactLogix systems is particularly streamlined‚ enabling unified control and monitoring. By leveraging these capabilities‚ users can achieve centralized control‚ real-time data exchange‚ and synchronized operations across their automation ecosystem. This ensures optimal performance‚ scalability‚ and adaptability in complex industrial environments. Proper integration also simplifies system management and maintenance‚ reducing downtime and enhancing overall productivity.
8.3 Using Add-On Instructions and Faceplates
Add-On Instructions (AOIs) and Faceplates are powerful tools for enhancing the functionality of the PowerFlex 753 drive. AOIs provide pre-configured logic for common tasks‚ such as motor control and sequencing‚ simplifying programming and reducing development time. Faceplates offer a graphical interface for monitoring and controlling drive parameters‚ enabling technicians to interact with the drive intuitively. These tools integrate seamlessly with Rockwell Automation’s programming software‚ allowing for easy customization and adaptation to specific application needs. By utilizing AOIs and Faceplates‚ users can streamline their automation processes‚ improve system performance‚ and reduce the learning curve for operators. This ensures a more efficient and user-friendly experience when working with the PowerFlex 753 drive in industrial automation systems.

Additional Resources and Support
Explore official manuals‚ online forums‚ and technical support for comprehensive guidance‚ troubleshooting‚ and updates to optimize your PowerFlex 753 installation and operation experience effectively.
9.1 Accessing the Official Reference Manual
9.2 Online Forums and Community Support
For additional guidance‚ users can explore online forums dedicated to PowerFlex 753 discussions. Platforms like Rockwell Automation’s official forum‚ Reddit’s automation communities‚ and specialized industrial control forums offer valuable insights. Skilled engineers and experienced users share tips‚ resolve common issues‚ and provide real-world applications. These forums are ideal for troubleshooting specific problems or optimizing drive performance. Users can search existing threads or post new questions for tailored advice. Such communities foster collaboration and knowledge exchange‚ helping users maximize their PowerFlex 753 installation and operation. Always verify advice against official documentation to ensure accuracy and safety compliance. Engaging with these forums can enhance your installation experience and problem-solving capabilities significantly. Active participation in these communities is highly recommended for ongoing support and learning.
9.3 Contacting Rockwell Automation Technical Support
For direct assistance with PowerFlex 753 installation or operation‚ users can contact Rockwell Automation’s technical support team. This service provides immediate help for complex issues‚ ensuring timely resolution. Support is available through phone‚ email‚ or online portals‚ depending on the region. Regional offices are equipped to handle specific queries‚ offering localized solutions. Engineers can assist with troubleshooting‚ configuration‚ and advanced customization. Additionally‚ Rockwell Automation offers premium support packages for prioritized service and access to specialized resources. Before reaching out‚ gather detailed information about the issue‚ including error codes or system configurations‚ to expedite support. This direct channel ensures professional guidance‚ minimizing downtime and optimizing system performance. Always verify the contact details from Rockwell Automation’s official website for accuracy. Utilizing this service enhances overall user experience and operational efficiency.